
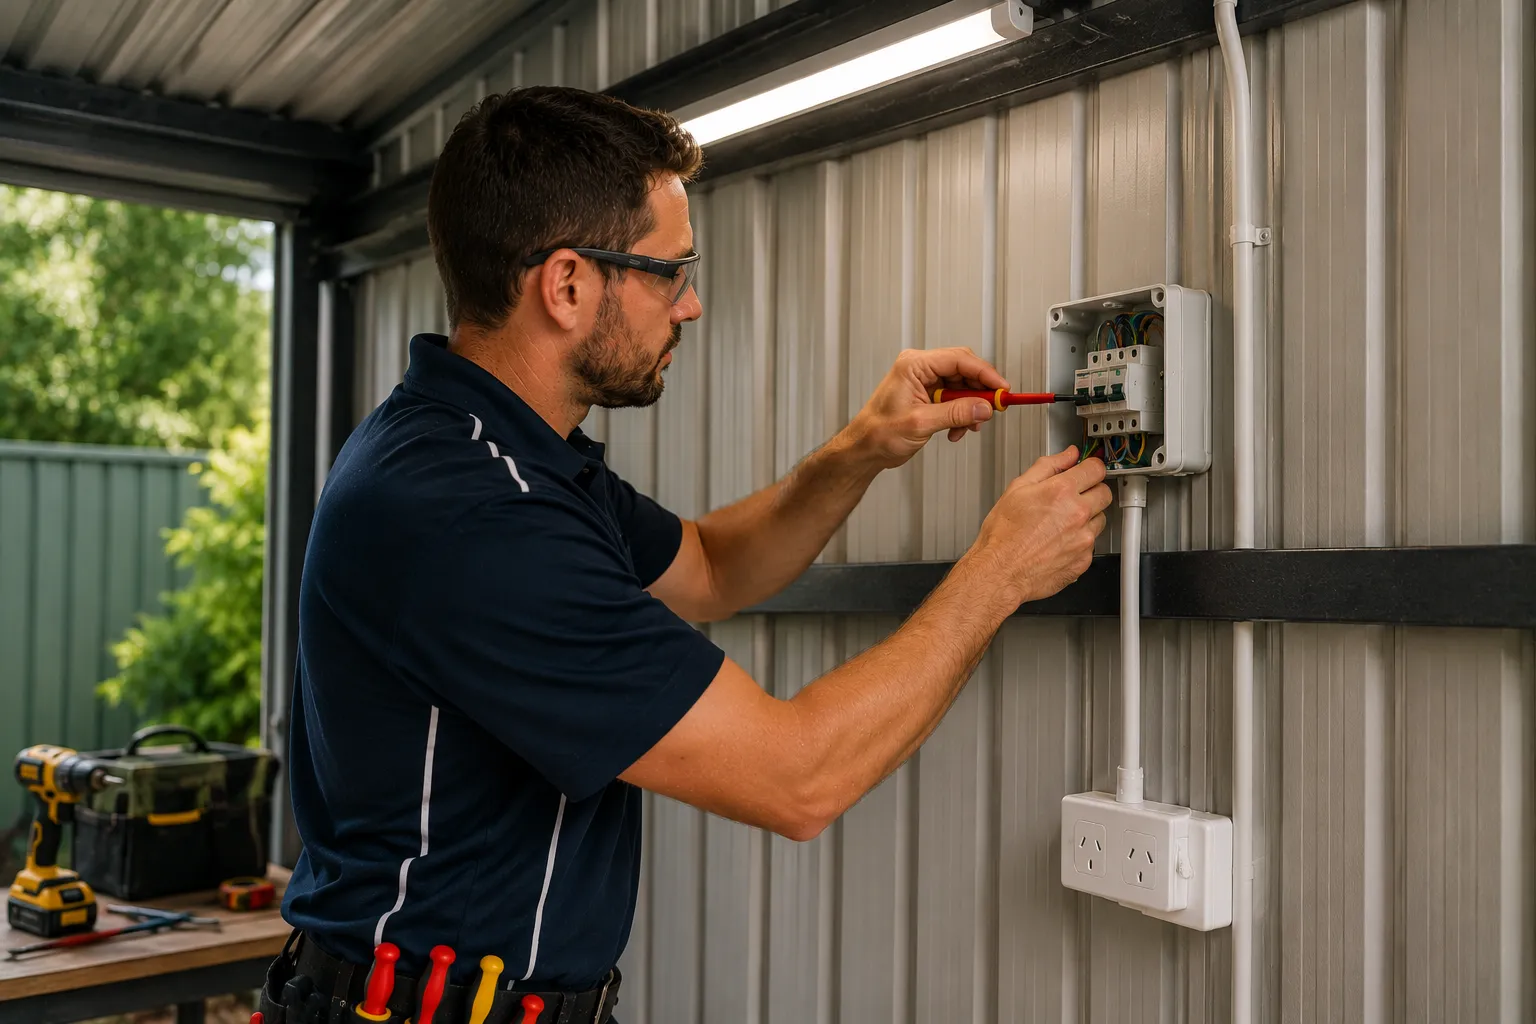
A shed without proper electrical is just storage. A shed wired properly becomes a workshop, a home gym, a hobby space, a music studio, a granny flat conversion, or just somewhere with reliable lighting and enough power to run the tools without tripping the house breaker every time you start the welder. Aurora Electrical Solutions delivers shed electrical across Brisbane, the Gold Coast, Logan and SEQ — backyard sheds in suburban properties, larger workshops on acreage in Park Ridge, Ormeau, Heathwood and Jimboomba, granny flat conversion prep, hobby workshops with three-phase machinery. Sub-board installation, underground cable runs from the main house, LED lighting designed for workshop use, single-phase and three-phase outlets, surge protection, and full compliance documentation. Aurora is a fully licensed Queensland electrical contractor (Licence EC91972), Master Electricians Australia members, fully insured.
What's included
- Sub-board installation in the shed with proper RCD/RCBO protection (mandatory under AS/NZS 3000:2018)
- Underground cable run from the main house switchboard to the shed (the most common method)
- Cable sizing per AS/NZS 3008 accounting for voltage drop on longer runs (16mm² for 50m+ runs is typical)
- Heavy-duty orange conduit installation for direct burial (minimum 500mm depth, deeper under vehicle paths)
- Overhead cable run alternative where trenching is impractical
- LED batten lighting for standard-ceiling sheds (typically 2-6 fittings per typical backyard shed)
- LED high-bay lighting for high-ceiling workshops and acreage sheds
- Standard 10A GPOs for general use (lighting, fridge, small tools)
- 15A GPOs for welders, compressors, and larger workshop tools
- 20A circuit GPOs for very heavy single-phase tools
- Three-phase outlets (32A or 63A) for workshop machinery — lathes, milling machines, large compressors, vehicle hoists, professional welders
- Surge protection device (SPD) at the sub-board — strongly recommended for Brisbane storm season
- Generator changeover switch for rural and acreage properties with backup generators
- Roller door motor power and switching
- Outdoor weatherproof GPOs for external shed walls
- Smoke alarms where the shed is used as a workshop or has habitable use
- Granny flat conversion electrical (when shed is being converted to secondary dwelling)
- Full Certificate of Compliance documentation issued on completion
When you need shed electrical work
If any of these apply, your shed is either operating with inadequate (or illegal) electrical or doesn't have proper power yet:
- You're running extension cords from the house to the shed (significant fire and trip hazard, not legal as a permanent solution)
- Your shed has lighting only — no GPOs for tools, fridge, or general use
- You can't run your workshop tools because the existing supply trips the breaker
- You want to set up a serious workshop (welder, compressor, lathe) and need three-phase
- You're converting the shed to a granny flat, home gym, music studio or hobby space
- Your existing shed wiring is decades old, lacks RCD protection, or shows visible damage
- Your shed is on acreage and needs a long underground run from the house
- You're building a new shed and want electrical designed in from the start
- Lightning strikes during Brisbane storms have damaged tools or appliances in your shed
- Your shed has no lighting and you're tired of working with extension cord lamps
- You need a dedicated circuit for the fridge/freezer you keep in the shed
- You want to add a roller door motor and need power for it
- Your existing supply is single-phase but the new workshop equipment is three-phase
- You're planning to add solar to power the shed independently
- You're a tradie working from home and need a properly-wired workshop
How much does shed electrical cost in Brisbane?
Shed electrical pricing depends primarily on cable run distance from the main house, single-phase vs three-phase, and the scope of internal fit-out. Here are typical Brisbane ranges for 2026:
- Basic shed electrical (short cable run, sub-board, 2 lights, 2 GPOs): typically $1,500 – $3,500 installed
- Standard backyard shed fit-out (sub-board, 4 lights, 4-6 GPOs, ~10m cable run): typically $2,500 – $5,000
- Workshop fit-out single-phase (sub-board, high-bay lighting, 15A and 10A GPOs, surge protection): typically $4,000 – $8,000
- Three-phase workshop fit-out (sub-board, lighting, three-phase outlets, single-phase outlets, surge): typically $6,000 – $12,000+
- Heavy workshop (welder + compressor + lathe circuits + lighting + safety): from $8,000+
- Underground cable run only (10m): typically $900 – $1,800 (trenching, conduit, cable, terminations)
- Underground cable run (30m, acreage): typically $2,500 – $4,500
- Underground cable run (50m+, lifestyle property): typically $4,500 – $8,000+ depending on cable size
- Sub-board installation alone (no cable run): typically $800 – $1,500
- Three-phase outlet (32A): typically $400 – $900 each installed
- Three-phase outlet (63A for heavy machinery): typically $700 – $1,400 each installed
- 15A GPO with dedicated circuit: typically $250 – $450
- LED batten light (per fitting): typically $120 – $280 supplied and installed
- LED high-bay light (per fitting): typically $300 – $650 supplied and installed
- Surge protection device (SPD) at sub-board: typically $400 – $900 installed
- Generator changeover switch: typically $1,200 – $2,800 installed
- Customer-dug trench discount: typically $20 – $40 per metre off the cable run quote
Every shed electrical job is custom-quoted from a site visit. Underground runs require accurate measurement of the route. We provide fixed-price quotes with itemised scope. Customers can dig their own trenches to save labour (we provide trench specifications and check the work before cable goes in) — common cost saving on acreage runs. Free quote across Brisbane and SEQ.
How long does shed electrical take?
Basic shed installs (short cable run, sub-board, lighting, GPOs) typically complete in 1-2 days. Standard workshop fit-outs run 2-4 days. Three-phase workshop installs typically take 3-5 days. Acreage installs with long underground runs (50m+) often take 4-7 days including trenching. The critical scheduling element is usually the trench: trenching can be done by the customer (saves labour cost) or by us, and trench timing dictates the cable-pull schedule. Power to the main house stays on throughout most of the work; we only need to isolate the house supply briefly when connecting the new sub-main to the main switchboard.
Single-phase vs three-phase shed — which do you actually need?
The single-phase vs three-phase decision is the most important technical choice for any shed electrical project. The right answer depends entirely on what you'll actually run in the shed:
- Single-phase is fine for: shed lighting, fridge/freezer, small hand tools, light power tools (drills, jigsaws, circular saws, sanders), small bench grinders, small compressors (under 2HP), small welders (under 180A), home gyms, music studios, hobby rooms, storage with lighting. The vast majority of suburban backyard shed jobs are single-phase.
- Three-phase is needed for: workshop lathes, milling machines, larger compressors (3HP+), vehicle hoists, professional MIG/TIG welders (200A+), large bench grinders, larger air conditioning, professional woodworking machinery (table saws, jointers, planers above hobby grade), commercial-grade dust extraction.
- Cost difference: three-phase shed installs typically run 50-80% more than equivalent single-phase due to heavier cable, three-phase sub-board, three-phase outlets, and any required supply upgrades. For a hobby workshop with light tools, single-phase is the right answer. For a serious workshop, three-phase is essentially required.
- Three-phase supply prerequisite: the main house switchboard must have three-phase supply available. Most Brisbane homes are single-phase from the street — upgrading to three-phase costs an additional $3,500-$7,500 typically and requires Energex coordination (2-6 weeks lead time). Worth checking before committing to a three-phase workshop design.
- Future-proofing approach: if you're not sure whether you'll need three-phase eventually, install the main house upgrade and three-phase sub-main to the shed during the initial project, but only fit single-phase outlets in the shed for now. Three-phase outlets can be added later without re-trenching. Modest upfront premium, dramatically cheaper than re-doing the underground run later.
- Voltage drop consideration: longer cable runs (30m+) need larger cable to keep voltage drop under the AS/NZS 3008 5% limit. A 50m run for a 32A circuit typically needs 16mm² cable; the same circuit at 10m only needs 6mm². Cable sizing dominates the cost on long runs — we calculate this precisely from your specific layout.
How a shed electrical project runs
Shed electrical follows a similar sequence whether it's a backyard 3m × 3m shed or a 12m × 9m acreage workshop. Here's how a typical project runs:
- Free site visit and scope discussion — We visit the property, measure the cable run from main switchboard to shed, identify the trench route (often follows fence lines or driveway edges), confirm cable sizing requirements, discuss the shed's intended use (workshop, gym, granny flat, storage), and identify what circuits and outlets are needed. We also check the main switchboard for capacity to support the new sub-main.
- Quote and design — Itemised scope: cable size and length, sub-board configuration, lighting layout, outlet positions, three-phase outlets if applicable, surge protection, any switchboard work needed. Fixed-price quote with clear inclusions. Customer-dug trench option discussed (typically $20-$40/m saving). Documentation includes a simple single-line diagram so you can see what's being installed where.
- Trench (customer or contractor) — Trench dug to AS/NZS 3000:2018 depth — minimum 500mm under landscaped areas, 750mm under vehicle paths. If customer is digging, we provide trench specifications and check the trench before backfilling. Orange heavy-duty conduit laid in the trench (this is what carries the cable — the cable itself isn't directly buried in good practice for residential installations).
- Cable pull and sub-board install — Cable pulled through conduit from main switchboard to shed. Sub-board mounted to the shed wall (steel-clad sheds need proper mounting hardware), cable terminated at both ends, RCD/RCBO protection installed, surge protection device fitted if specified. Sub-board labelled clearly.
- Internal shed wiring — Lighting circuit run with switches at door positions, GPO circuits run with surface-mounted conduit (the only practical method in steel-clad sheds), three-phase outlets installed at specified machinery positions, any specialty wiring (roller door motor, ventilation fans, ceiling fans, AC) completed.
- Testing, certification, walkthrough — All circuits tested per AS/NZS 3000:2018. RCD trip testing. Light fittings switched and confirmed operational. GPO polarity and earth continuity verified at every outlet. Three-phase rotation checked at three-phase outlets. Surge protection device tested. Certificate of Compliance issued. Walkthrough with customer explaining the sub-board layout, breaker functions, and what to do if anything trips.
Why running power to a shed isn't a DIY job
The single most common shed electrical mistake in Brisbane is running an extension cord from the house to the shed as a permanent solution. It's tempting — power is delivered, tools work, the job seems done. The problems with this approach are real:
Fire risk: extension cords aren't rated for permanent installation. UV degradation, moisture ingress, mechanical damage, and connection overheating all accumulate over months and years. The cord that worked fine year one becomes a fire risk by year three. Many residential shed fires in Brisbane trace back to permanent extension cord installations.
Inadequate capacity: standard household extension cords are 10A rated. The starting current of a workshop compressor or welder can exceed this transiently, causing voltage drop, breaker trips, and progressive damage to the cord and the tool. Heavy-duty extension cords help but still aren't rated for permanent use.
Trip hazard: cables across yards are an obvious physical hazard, particularly in rain. Buried cables that aren't in proper conduit at proper depth are equally hazardous when discovered by garden tools, building works, or pets digging.
Legal issue: permanent electrical supply to a separate structure must be installed by a licensed electrician under the QLD Electrical Safety Act 2002. DIY extension cord "permanent" installations are technically non-compliant electrical work, with the same legal and insurance implications as any other unlicensed electrical work.
Insurance impact: many home contents insurance policies exclude claims arising from non-compliant electrical work. A shed fire caused by a deteriorated extension cord installation can void claims on both shed contents and any home damage.
The cost of doing the job properly is genuinely modest for most installations. A basic backyard shed with proper underground cable, sub-board, lighting and GPOs typically costs $1,500-$3,500 — a fraction of the cost of an uninsured shed fire or one workshop tool damaged by voltage problems.
Underground vs overhead — choosing the cable route
Power gets from your main house switchboard to the shed via one of two methods: underground (buried in conduit) or overhead (suspended on poles or attached to building structures). Underground is the dominant choice in modern Brisbane installations; overhead has specific use cases.
Underground (the standard approach): cable runs through orange heavy-duty PVC conduit buried at AS/NZS 3000:2018 minimum depth. Under landscaped or pedestrian areas: 500mm. Under vehicle-accessible areas (driveways): 750mm. Conduit terminates at the main switchboard wall and at the shed wall, with cable continuing into the buildings via wall penetrations.
Underground advantages: cleaner appearance (nothing visible above ground), better protection from storms (no overhead cable damaged by falling branches), better safety (no overhead cable damaged by tall vehicles or equipment), longer service life (protected from UV and weather).
Underground considerations: trenching adds 1-2 days to the project, can be disruptive to lawn and garden, may require careful routing around tree roots and irrigation systems. Customer can dig their own trench to save labour (typically $20-$40 per metre saving).
Overhead: cable suspended on a catenary wire between poles or building structures, minimum height clearances per AS/NZS 3000:2018 (typically 3.0m over pedestrian areas, 5.5m over vehicle areas).
Overhead use cases: trenching is genuinely impractical (rocky ground without rock saw access, mature established gardens that can't be disturbed, river or creek crossings), short distance with clean line-of-sight (under 20m), temporary installations.
Brisbane-specific consideration: storm season makes overhead cable more vulnerable. Falling branches during summer storms damage overhead runs regularly; properties in storm-prone areas (which is most of Brisbane) benefit from underground installations even when overhead would be slightly cheaper upfront.
Aurora installs both methods; underground is the default recommendation for most installations. For acreage properties with very long runs (50m+), the underground option is essentially required — overhead runs of that length need engineered support systems that often exceed the cost of trenching anyway.
Shed sub-board — why you can't just run circuits direct from the main house
Every shed electrical installation needs a sub-board (also called a sub-distribution board or shed distribution board) — a small switchboard inside the shed housing the circuit breakers, RCDs, and termination point for the supply from the main house. This isn't optional, even for small backyard sheds:
AS/NZS 3000:2018 requirement: every detached structure with electrical supply must have its own RCD protection. The simplest compliant way to achieve this is a sub-board at the shed end with RCDs covering all shed circuits.
Practical convenience: when something trips in the shed, you reset it at the shed sub-board — not by walking back to the main house. Critical for workshops where breakers occasionally trip during normal use.
Future expansion: adding new circuits in the shed (additional lighting, new outlets, new machinery) doesn't require running cable back to the main house — they branch off the sub-board. Substantially cheaper than running each new circuit back to the main board.
Surge protection: the sub-board is the right location for a surge protection device (SPD) covering all shed equipment. SPDs absorb voltage spikes from lightning (very relevant during Brisbane storm season) before they reach expensive workshop tools. $400-$900 installed at the sub-board, cheap insurance for a workshop with $5,000+ of tools.
Isolation: a main isolator at the sub-board lets you cut all shed power for maintenance work without affecting the house. Essential safety feature for serious workshops.
Typical residential shed sub-board: 4-8 way capacity, main isolator, RCD/RCBO protection on every circuit, optional surge protection device, optional generator changeover. Cost: $800-$1,500 installed for the sub-board itself, not including the main supply cable run.
Workshop lighting — getting it right for the work you actually do
Shed lighting design depends on what you're doing in the shed. A storage shed needs basic ambient light. A hobby workshop needs much more — bright, glare-free, properly distributed across work surfaces. Brisbane workshops typically use one of three lighting approaches:
LED batten lighting (the workshop standard) — long linear fittings typically 1.2m or 1.5m long, with multiple LEDs producing uniform light along their length. Suited to standard ceiling heights (2.4-3m). Output: 3,000-5,000 lumens per fitting. Light colour: cool white (5,000-6,500K) is standard for workshops — appears bright, neutral, doesn't tint colours. Aurora typically installs 2-6 batten fittings per typical backyard shed, 6-12+ for larger workshops.
LED high-bay lighting — for higher-ceiling sheds (4m+), high-bay fittings replace battens. UFO-style or linear high-bay LEDs produce 10,000-30,000 lumens per fitting and are designed to throw light down from height. Common in acreage workshops and serious commercial-grade hobby setups.
LED downlights or recessed — for sheds with finished ceilings (e.g. granny flat conversions), recessed downlights provide the cleanest appearance. More fittings required for equivalent lumen output, higher install cost per fitting.
Switch placement matters — workshop lighting should switch at the main entry door (turn on as you arrive) and ideally at a second position too (the back of the shed, so you can turn lights off as you leave through the main door). Two-way switching adds modest cost but transforms workshop usability.
Sensor switching for storage areas — PIR motion sensors are useful for sheds where you'll only spend short periods, particularly outdoor security lighting attached to the shed. Auto-on, auto-off after timeout. We design this in where it adds value.
Light colour and CRI: workshop lighting should be cool white (5000-6500K) with high CRI (Colour Rendering Index 80+). Warm white in a workshop makes colour-critical work (paint matching, electronics, anything visual) substantially harder. We specify cool white as standard for workshop fittings unless the shed has habitable use.
Granny flat conversions — when a shed becomes a dwelling
Shed-to-granny-flat conversion is one of the highest-value adaptive reuse projects in Brisbane, and the electrical scope is substantially different from a workshop shed. A converted granny flat is a habitable dwelling — full residential electrical scope applies.
Increased electrical scope: lighting throughout (bedroom, living, kitchen, bathroom), GPOs at residential density (typically 4-6 double GPOs per main room), kitchen appliance circuits (oven, cooktop, dishwasher, fridge, microwave), bathroom electrical (exhaust+light+heater, vanity lighting, IP-rated fittings), heated water (hot water system circuit), AC circuit (split system typically), smoke alarms (interconnected per residential requirements), data cabling for internet.
Separate sub-board capacity: a granny flat needs sub-board capacity of 5-8kVA typically — substantially more than a workshop shed. Cable size and sub-board specification need to reflect this.
Building approval typically required: shed-to-dwelling conversion almost always triggers building approval (BA) requirements under the Building Act 1975, and the electrical work must be certified to AS/NZS 3000:2018 for residential dwellings (which is stricter than for workshop sheds). We coordinate with your building certifier on the electrical scope.
Separate metering option: if the granny flat will be rented separately, separately-metered supply is possible (requires Energex coordination, typical lead time 4-8 weeks, additional cost $1,500-$3,500 for the metering work).
Typical scope and cost: shed-to-granny-flat electrical conversion typically $8,000-$18,000 depending on size and finish level. The shed structural conversion (insulation, internal lining, plumbing rough-in, bathroom installation, kitchen installation) happens around the electrical work — we coordinate with the broader conversion program.
If you're considering shed-to-granny-flat conversion in Brisbane, the electrical scope is one of the largest line items in the project budget — worth engaging early to scope it accurately. Brisbane planning rules allow many granny flat conversions on standard residential blocks, with strong rental yields making the math attractive for many homeowners.
Acreage and lifestyle properties — the long-run challenges
Acreage and lifestyle properties around Brisbane (Park Ridge, Ormeau, Heathwood, Jimboomba, Mount Cotton, Pinkenba semi-rural) have shed electrical requirements that differ substantially from suburban backyard sheds. The distances are longer, the cable specifications are larger, and the practical workflow is different.
Cable sizing dominates the budget: a 50m run for a 40A workshop sub-board typically needs 16mm² cable; a 100m run might need 25mm² or larger. Cable cost per metre rises non-linearly with size, so long runs cost much more than the distance alone suggests. Worth calculating accurately from the actual route during the quote.
Voltage drop calculation: AS/NZS 3008 limits voltage drop to 5% from main switchboard to point of use. On long runs, voltage drop is the gating constraint that determines cable size — and once you've sized for voltage drop, the cable is usually heavily over-sized for current capacity (which is fine, just adds cost).
Trenching practicalities: most acreage owners dig their own trenches with their own machinery (mini excavators, post-hole augers, trenchers) to save labour cost. We provide trench specifications (depth, width, route, conduit installation method) and inspect the trench before cable goes in.
Rock and difficult ground: parts of SEQ acreage have rocky substrate that makes standard trenching impractical. Rock saws can cut through but add substantially to cost ($30-$60 per metre). Overhead supply becomes more attractive in genuinely difficult ground.
Three-phase common: acreage workshops are much more likely to need three-phase than suburban sheds — vehicle hoists, large compressors, professional welders, agricultural machinery, large pumps. Where three-phase supply is already at the main house, it's typically extended to the shed via the same trenching project (modest additional cable cost).
Generator changeover: many acreage properties have backup generators (storm season power outages, occasional grid faults). A generator changeover switch at the shed sub-board (or main house, depending on layout) lets the property switch to generator power safely. Cost: $1,200-$2,800 installed.
Energex coordination for three-phase supply upgrades on acreage typically takes 2-6 weeks. Worth initiating early in the project — Energex's residential three-phase upgrades aren't fast-tracked in Brisbane's current trade-pressure environment.